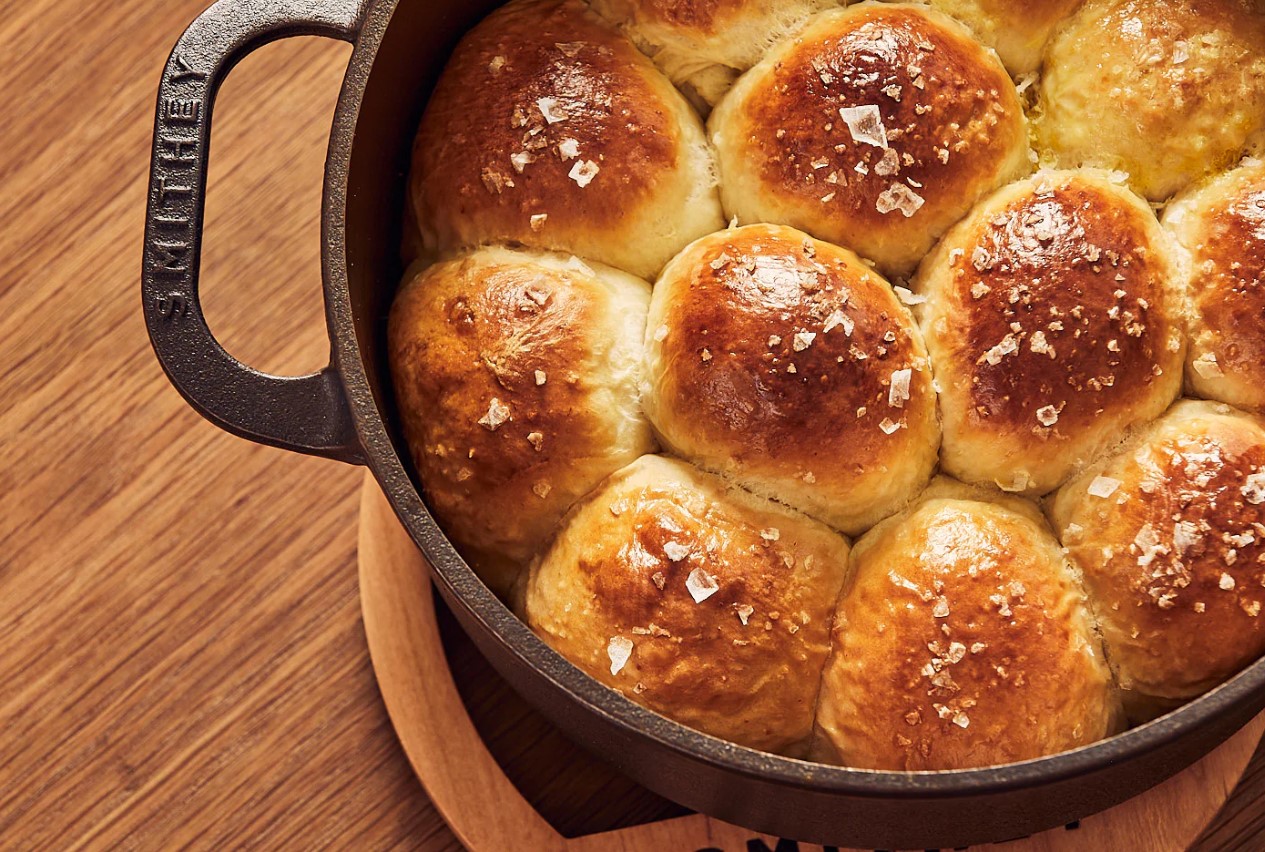
Nothing says “home for the holidays” like the smell of warm, freshly baked dinner rolls. These soft, buttery rolls come together in just 45 minutes, making them perfect for last-minute gatherings or when you need an easy addition to your holiday meal.
Whether you’re serving them alongside a big turkey dinner, dipping them into gravy, or just slathering them with butter, these rolls are guaranteed to impress your guests.
The best part? You don’t need to be a pro baker to make them! This recipe uses simple ingredients and a quick-rise method, so you can have homemade bread on the table without spending hours in the kitchen. They’re golden on the outside, fluffy on the inside, and packed with that classic holiday flavor.
Get ready to fill your home with the delicious aroma of fresh bread—your guests will be asking for seconds (or thirds)!

Holiday Dinner Rolls Recipe
Equipment
- Large mixing bowl
- Stand mixer (optional, but helpful)
- Measuring cups and spoons
- Baking sheet
- Parchment paper or lightly greased pan
- Kitchen towel
- Pastry brush (for butter topping)
Ingredients
- 1 Cup Warm water (110°F)
- 2 Tbsp granulated sugar
- 2¼ Tsp Instant yeast
- 3 Tbsp Unsalted butter (melted)
- 1 Tsp Salt
- 1 Large egg
- 3½ Cups All-purpose flour
- 2 Tbsp Butter (melted, for brushing)
Instructions
- Activate the YeastIn a large mixing bowl, combine warm water, sugar, and yeast. Stir gently and let sit for 5 minutes until foamy.

- Mix the DoughAdd melted butter, salt, and egg to the yeast mixture. Gradually add flour, one cup at a time, stirring until a soft dough forms. If using a stand mixer, knead for about 3-4 minutes. If mixing by hand, knead on a floured surface for 5 minutes until smooth.

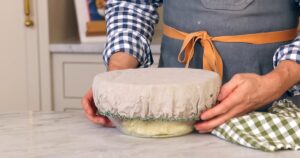
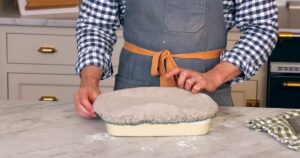
- Let it RiseCover the dough with a kitchen towel and let it rest for 10-15 minutes in a warm spot until slightly puffed.
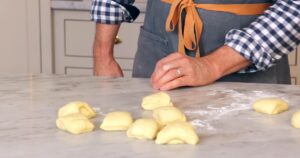
- Shape the RollsDivide the dough into 12 equal portions. Roll each into a smooth ball and place them on a parchment-lined or greased baking sheet, evenly spaced.
- Second RiseCover with a kitchen towel and let rest for another 10 minutes while preheating the oven to 375°F (190°C).
- BakeBake for 12-15 minutes, or until golden brown on top.

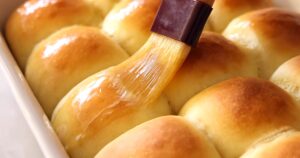
- Butter Them UpRemove from the oven and immediately brush with melted butter for a soft, shiny finish.
- Serve WarmEnjoy fresh out of the oven with butter, honey, or alongside your holiday feast!

Video
Notes
- For extra-soft rolls, place a small dish of water in the oven while baking to create steam.
- If you want slightly sweeter rolls, add an extra tablespoon of sugar.
- These rolls freeze well! Let them cool completely, then store in an airtight bag for up to a month. Reheat in the oven at 300°F for a few minutes.
How to Keep Dinner Rolls Soft and Fresh for a Longer Time?
Nothing is worse than making delicious, fluffy rolls only to have them turn hard and dry the next day. The good news is that keeping them soft and fresh is easy with just a few simple tricks.
Store Them Properly
The best way to keep dinner rolls fresh is to store them correctly from the start. After they’ve cooled completely, place them in an airtight container or a resealable plastic bag. This prevents them from drying out. If you don’t have a container or bag, tightly wrap them in plastic wrap or aluminum foil to lock in moisture.
Many people make the mistake of putting bread in the fridge, thinking it will stay fresh longer. But actually, refrigeration speeds up the staling process and makes rolls dry and tough. Instead, keep them at room temperature in a cool, dry place. Stored this way, your rolls will stay fresh for up to three days.
Reheating Without Drying Them Out
Reheating rolls the right way is just as important as storing them properly. If you reheat them incorrectly, they can become dry and rubbery. The best method is to use the oven. Wrap the rolls in aluminum foil and place them in a 300°F (150°C) oven for about 10 minutes. The foil helps trap moisture so they stay soft.
If you’re short on time, the microwave works too, but there’s a trick to it. Wrap the rolls in a damp paper towel and microwave them for 10-15 seconds. This keeps them from drying out. Just don’t overdo it, or they’ll turn chewy instead of soft.
Another great tip is to brush warm rolls with melted butter. Not only does this add flavor, but it also keeps the tops from getting too crusty.
What to Serve with Holiday Rolls?

Dinner rolls are more than just a side dish—they’re the perfect companion to so many holiday favorites. Whether you’re using them to soak up gravy, pair with a warm bowl of soup, or spread with delicious toppings, they always find a way to fit on the table.
Classic Holiday Mains
These rolls shine next to a traditional roast turkey, especially when used to mop up extra gravy. Honey-glazed ham is another excellent pairing since the sweetness of the meat goes perfectly with soft, buttery bread.
If you’re serving prime rib or roast beef, dinner rolls help balance out the richness and make a great vessel for leftover sandwiches the next day.
Soups That Pair Perfectly
There’s nothing more comforting on a cold winter night than a warm roll with a bowl of soup. Creamy tomato soup is a classic choice, especially if you like dipping your bread.
A thick, cheesy potato soup also works well, giving you something hearty and satisfying. Butternut squash soup, with its hint of sweetness, pairs wonderfully with warm, buttery rolls.
Spreads and Toppings to Try
While rolls are great on their own, adding a spread takes them to another level. A simple pat of butter is always a safe bet, but if you want something more special, try making honey butter by mixing softened butter with a bit of honey.
Garlic herb butter is another tasty option—just melt some butter and mix it with minced garlic, salt, and fresh herbs like rosemary or thyme. If you prefer something sweet, jam or fruit preserves like raspberry or apple butter make a perfect holiday treat.
Try These Variations of Holiday Dinner Rolls
The classic version of these dinner rolls is always a hit, but if you want to switch things up, there are plenty of ways to customize them. Whether you’re in the mood for something savory, sweet, or even healthier, these variations will keep things interesting.
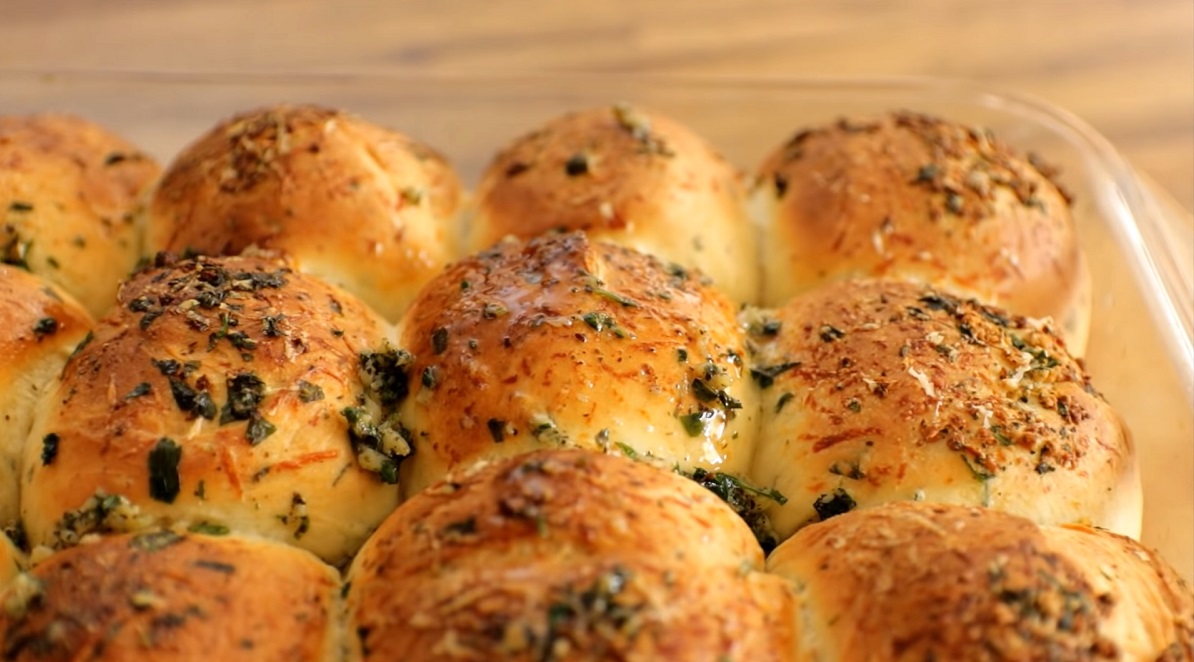
Garlic Parmesan Rolls
For a more flavorful, cheesy twist, add 1 teaspoon of garlic powder to the dough before mixing. Once the rolls are shaped and ready to bake, sprinkle some grated Parmesan cheese on top. When they come out of the oven, brush them with garlic butter (melted butter mixed with minced garlic) for even more flavor. These rolls pair perfectly with pasta dishes or hearty stews.
Honey Butter Rolls
If you love a hint of sweetness in your bread, try adding 2 tablespoons of honey to the dough. This gives the rolls a slight caramel-like taste without being overpowering. Once they’re done baking, brush them with a mix of melted butter and honey for extra shine and flavor. These are especially good alongside ham or roasted vegetables.
Honey Butter Rolls
Adding herbs and cheese makes these rolls extra flavorful. Stir in 1 teaspoon of dried rosemary, thyme, or oregano into the dough. For a cheesy version, mix in ½ cup of shredded cheddar or mozzarella. These rolls work great as a side for soups, salads, or even as a base for mini sandwiches.
Whole Wheat Rolls
For a slightly healthier version, replace half of the all-purpose flour with whole wheat flour. Since whole wheat flour absorbs more moisture, add an extra tablespoon of honey to keep the rolls from becoming too dense. These rolls are a great option if you want something a bit heartier while still being soft and fluffy.
Cinnamon Sugar Rolls
Want to turn your dinner rolls into a sweet treat? Add 1 teaspoon of cinnamon and 2 tablespoons of sugar to the dough. After baking, brush the tops with melted butter and sprinkle with a mix of cinnamon and sugar. These taste amazing as a holiday breakfast or a warm dessert with coffee.
Can You Make Them Without Yeast?
Yes! If you don’t have yeast or don’t want to wait for the dough to rise, you can still make soft, fluffy rolls using baking powder instead. While the texture will be a little different—more like a biscuit than traditional dinner rolls—they’re still delicious and much quicker to make.
How to Make No-Yeast Dinner Rolls
To replace yeast, you’ll need baking powder to help the rolls rise. Here’s what you need:
- 2 cups all-purpose flour
- 1 tablespoon baking powder
- ½ teaspoon salt
- 2 tablespoons melted butter
- ¾ cup warm milk
Instructions
- Preheat your oven to 375°F (190°C).
- In a large bowl, mix the flour, baking powder, and salt together.
- Stir in the melted butter and warm milk until a soft dough forms.
- Shape the dough into 12 small rolls and place them on a greased baking sheet.
- Bake for 15-18 minutes, or until they turn golden brown.
- Remove from the oven and brush with more melted butter for extra softness.
Yeast Rolls vs. No-Yeast Rolls
Yeast rolls are softer, fluffier, and have a slightly chewy texture. The yeast gives them that classic light and airy feel. No-yeast rolls, on the other hand, are a bit denser and more biscuit-like. They’re still tasty, just different! If you’re in a hurry or don’t have yeast on hand, this version is a great alternative.
FAQs
1. Can I Use Bread Flour Instead of All-Purpose Flour?
Yes, you can! Bread flour has a higher protein content than all-purpose flour, which can make your rolls slightly chewier and give them a bit more structure. If you want super soft and fluffy rolls, stick with all-purpose flour. But if you like a slightly chewier texture, bread flour is a great option. You don’t need to change any other ingredients—just swap it 1:1.
2. Why Did My Rolls Turn Out Too Dense?
Dense rolls usually happen when the dough doesn’t rise properly. This could be because the yeast was old, the water was too hot and killed the yeast, or the dough wasn’t kneaded enough. Make sure to check that your yeast is fresh before using it. Also, if the dough feels too dry, add a little extra warm water or milk to help soften it up. Kneading the dough properly is also important—5 minutes of kneading by hand or 3-4 minutes in a stand mixer should do the trick.
3. Can I Make the Dough Ahead of Time and Bake Later?
Yes! If you want to prepare the dough in advance, you can make it a few hours ahead or even overnight. After kneading, cover the dough tightly with plastic wrap and let it rise in the refrigerator overnight. When you’re ready to bake, let it sit at room temperature for about 30 minutes before shaping and baking as usual. This is a great option if you want fresh rolls but don’t have time to make the dough on the same day.
4. What If I Don’t Have a Stand Mixer?
No problem! You can make these rolls completely by hand. Just mix the ingredients in a large bowl with a wooden spoon until the dough starts coming together. Then, knead it on a lightly floured surface for about 5-7 minutes until the dough is smooth and elastic. It takes a little more effort, but the results will be just as good.
5. How Do I Get a Shinier, Golden-Brown Crust?
For extra golden and shiny rolls, brush the tops with an egg wash before baking. To make an egg wash, whisk together 1 egg yolk and 1 tablespoon of milk and brush it lightly over the rolls before they go in the oven. This will give them a rich golden color and a beautiful glossy finish. If you prefer a softer crust, just stick with brushing them with butter after baking.
The Bottom Line
Soft, buttery, and ready in just 45 minutes, these holiday dinner rolls bring warmth to any meal. Easy enough for beginners, yet delicious enough to impress a crowd. Perfect alongside turkey, soup, or simply slathered with butter. Customize them with herbs, cheese, or honey for extra flavor. Bake a batch and watch them disappear—nothing beats homemade bread fresh from the oven.
Another Quick Recipe to Check – How to Make Taco Shells in The Air Fryer
I’m Leo McIntyre, and my love for cooking was born in my grandmother’s kitchen, where I discovered the magic of traditional Southern recipes. Inspired by her passion and the flavors of my childhood, I started SouthernParm to share these treasured family dishes and keep the rich culinary traditions of the South alive for everyone to enjoy.